Do you like cross-stitch but think it takes too much time? Do you like paint by numbers but find that it always makes a mess? Well, I have the best new craft for you!
Diamond painting has been around for a number of years now and is the perfect craft to take up because it is the perfect mix between cross-stitch and paint by numbers. All you need to start is the kit, some washi tape, and you’re set!
Originating five to six years ago, most likely in China, diamond painting is applying tiny resin drills (the diamonds) to a DMC-coded adhesive canvas to create vibrant paintings that look like mosaics. In videos and other FAQ you’ll hear and see the term drills and diamonds used interchangeably since they’re one and the same.
Diamond paintings typically come with either round or square diamonds. You either fully cover the canvas or, if you’re doing a special diamond painting, only cover certain areas. Special diamond paintings usually come with different sized and shaped diamonds like hearts, petals, and other fun options.

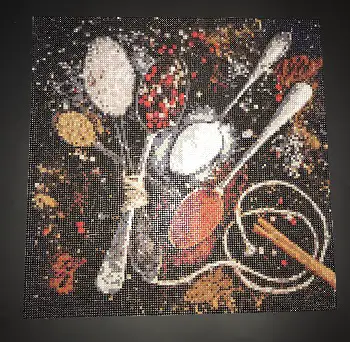
Full round painting around 15 in by 15 in 
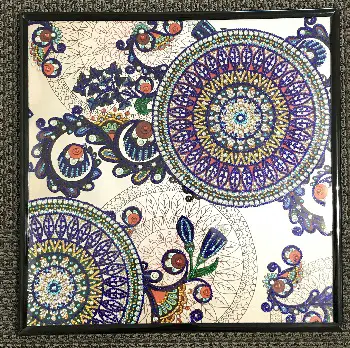
Special painting around 15 in by 15 in
As you can see in the photos above, on the left is a full “round” painting and to the right is a special painting that came with diamond-shaped drills and other shapes. This craft has expanded considerably in the last two years, with diamond painted journals, clocks, ornaments, and other products entering the market.
I picked up diamond painting in the fall of 2018 after receiving numerous Instagram ads and bought my first painting from Paint with Diamonds, which had a sale at the time. I immediately fell in love because the methodical nature of this craft is incredibly soothing and, unlike cross-stitching, is much easier to fix if I make a mistake.
Similarly, unlike painting by numbers you also don’t have to worry too much about a mess. Until of course, like all diamond painters, you knock over your tray of diamonds. Still, that’s easy to clean up with a vacuum and is just part of the rite of passage into joining this craft.
Purchasing Diamond Paintings
Diamond painting is also incredibly inexpensive if you shop around and order from AliExpress with paintings as cheap as $5. Of course right now with shipping and USPS concerns, what usually takes two to three weeks to arrive might take months. However, due to the rise in popularity in the last two years, diamond paintings are available in nearly every hobby store in the US like Michael’s, Joann’s, and even at Walmart.
This craft is admittedly time-consuming, but once you get the hang of it, diamond paintings are pretty quick to do and can be completed over the course of a week depending on the size. Plus for multi-taskers, this is a great craft because you can put on the TV, podcast, audiobook, whatever.
Now the most important part of the process. Picking which one to purchase! As mentioned earlier, AliExpress is incredibly cheap. The majority of my 40 paintings have been purchased from there, costing on average six bucks including a dollar or two for shipping. Add in some $10 frames from Walmart and this has been a fantastic way for me to make personalized (but affordable!) gifts for my loved ones and decor for my home.
However, it can be a little hard to decide which canvas to pick, especially since you can’t see it before you purchase it! Fortunately, after having ordered so many, I’ve determined an almost perfect method of picking canvases online. (In-person is much easier because all you’re doing is deciding on the cost and which image to get from the store’s pre-packaged item).
The first thing to know is that diamond paintings are always measured in centimeters so if you’re used to measuring items in inches, definitely convert. The second thing is that no canvas is actually the full size marked on the item. Meaning, a 30cm by 40cm size marking is for the full canvas, but the actual drill area is usually a bit smaller.
For images that need to show detail, always, always go bigger. Most canvases come in pre-set sizes and you can get pretty big. Some of the largest diamond paintings I’ve seen have been over 4 or 5 feet long!
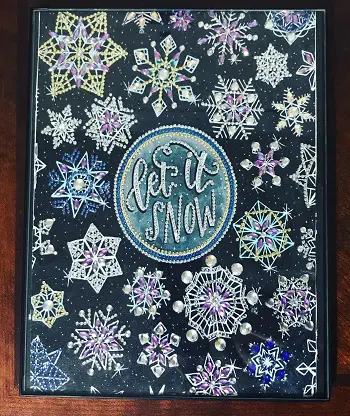
Special diamond paintings are usually fine in smaller sizes like the one below which is 10 in by 13 in.

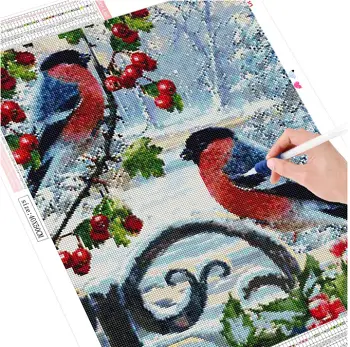
When purchasing a diamond painting online from a store on AliExpress, you can directly message the seller to see what the canvas will look like before it is printed for an item, which is especially important when ordering a custom painting (your own image). The best stores already have a picture like below. Most US stores also have an image in their product item descriptions. This way you can tell whether the image resolution of the painting is good enough for you.

When deciding between round or square diamonds, it’s really a personal preference. Square paintings require a bit more finesse and for anyone who is more meticulous, can get frustrating. Round diamond paintings on the other hand are much easier to align if a diamond or two moves. The more facets there are, whether on a square or round drill, the shinier the finished piece will look. Some kits also have AB (aurora borealis) diamonds which are even shinier than the regular diamonds due to a special coating.
My only point of caution, if you find an image that is quite clearly someone else’s art or not a stock image of an animal, definitely try to find it in a US store because the price is higher and it should be! That shows that the art has been licensed for use. A lot of the Chinese stores do not license other people’s art, which is obviously uncool.
Finally, reviews both on websites and on YouTube are great if you decide to stick with the craft. There are many stores that are not of great quality and others that are incredible depending on your diamond painting needs.
So how to do a diamond painting?
Actually Diamond Painting
The very first thing you should do once you’ve received your kit is peel back the cover to make sure the image looks correct. If there are any rivers in the canvas because the glue has wrinkled, you can take an exact-o knife and cut the river and it will go away. Then you should sort your drill bags and make sure you have the number of bags as indicated on the inventory sheet.
I immediately cut the bags and sort them into my sorting storage kits which are tiny boxes that look like jewelry storage and are available at any craft store/online. I mark the inventory sheet from 1- however symbols are on the sheet, and then pour the drills into the corresponding container in my kit. I marked each section of the container from 1 to 24 and the second container from 25 to 48.
This means I don’t have to rewrite symbols for every new diamond painting and it is much easier to keep track of what drills I’m using at what time because I tape the inventory sheet to the storage container.
Next, peel back the edges of the cover sheet and line the outer edges with washi tape which protects from dirt and dust. Cover the canvas and then peel back a small portion to start diamond painting! I score the entire cover sheet lightly with scissors and create my own grid so as I finish a section I can remove the cover from that area entirely.
Applying the drills is incredibly easy! First, you take the drill that matches whichever section you wish to start with, pour it into the provided (usually green) tray, and shake it gently into the tray. The pen is loaded with the (usually) pink wax.
Then you tap the single diamond (or row of diamonds if using the multi-placer side of the pen) and then tap it gently onto the canvas where it belongs. The video below goes into these steps in more detail.
Of course like any craft, there are endless accessories that dedicated diamond painters use like magnets to hold the portion of the canvas cover back. There’s thousands of pens for sale, kits that come with sorting mechanisms, and a variety of other tools.
All you really need is one sorting system, a larger tray for the diamonds (I use the blue one found in this kit), a light pad to place under the canvas so that you can see the symbols better, and the washi tape for the outer edges of the canvas.
Once you’re all done, using a clean brush of some kind, (many folks use toothbrushes), brush away any dust or debris that may have gotten stuck in the painting. Then roll over the canvas with a rolling pin (or another heavy cylindrical item) to make sure all the diamonds are in place. If you’re doing a square painting, this step is an absolute must because it helps click all the square diamonds into place neatly. And the clicking is pretty nice to hear.
Then frame or hang your canvas however you want!
Now you’ve finished your first diamond painting (of hopefully) many.
Image courtesy of Pixabay.
Have strong thoughts about this piece you need to share? Or maybe there’s something else on your mind you’re wanting to talk about with fellow Fandomentals? Head on over to our Community server to join in the conversation!

